VM Setup Guide for Apple Silicon Machines (Mac M1/M2/M3)
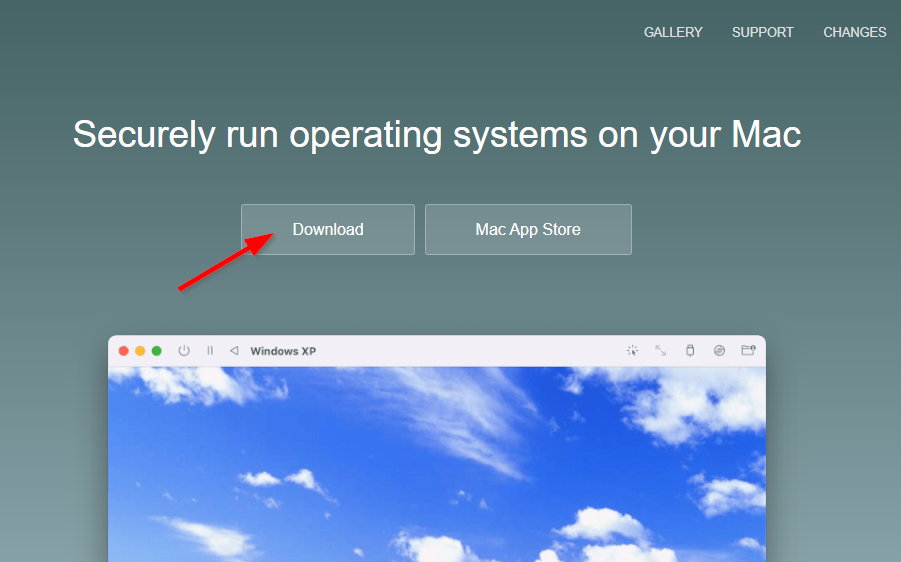
Step 1: Download UTM.
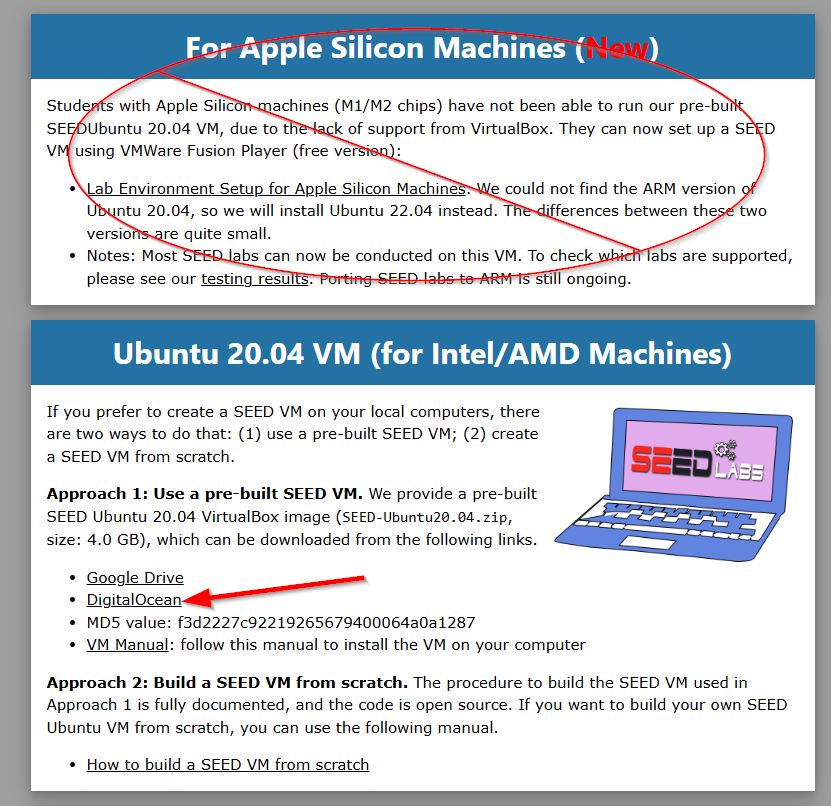
Step 2: Download the SeedLabs Ubuntu 20.04 VM. Do NOT download the one for Apple Silicon, since we are using an emulator instead. Download the Ubuntu 20.04 image for Intel/AMD
Step 3: Unzip the file you downloaded in step 2, and save it someplace safe that you can remember. I recommend your documents folder.
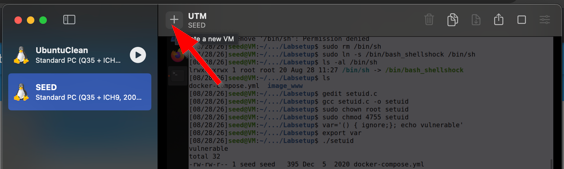
Step 4: Launch UTM, and Click on new VM
Step 5: Select Emulate
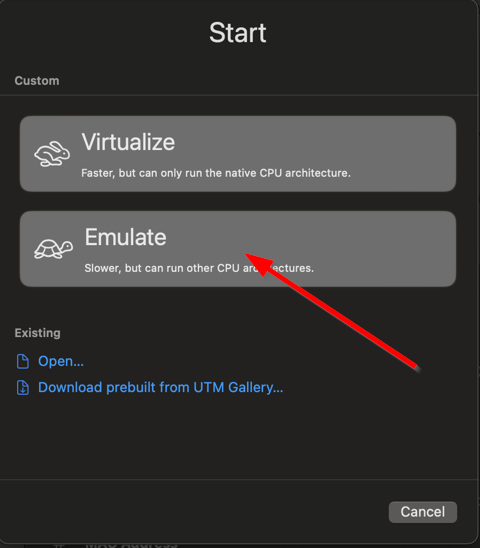
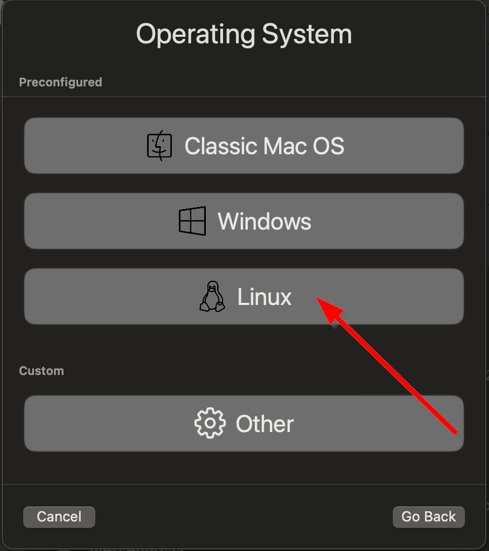
Step 6: Select Linux
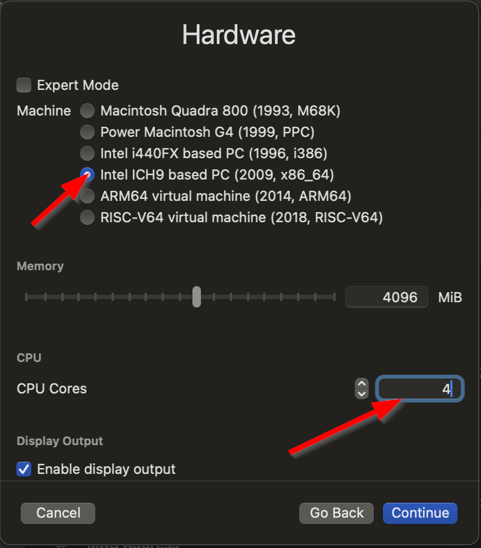
Step 7: Select Intel ICH9, and pick 4 cores
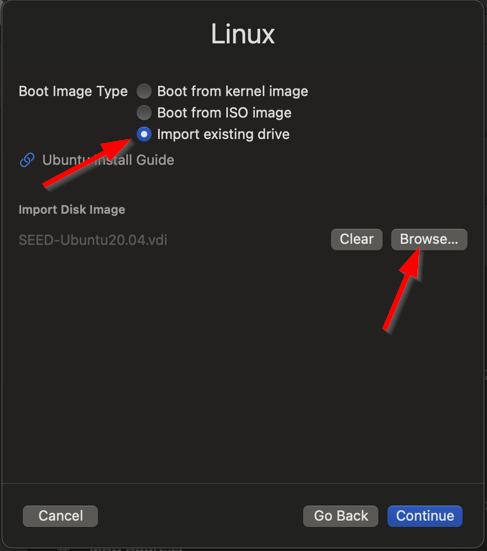
Step 8: Select "Import existing drive", and then use the browse button to find the file you saved in step 3 (SEED-Ubuntu).
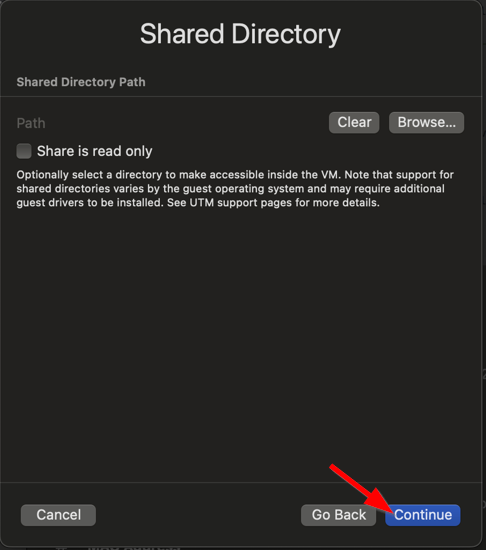
Step 9: Just select continue on tne Shared Directory screen
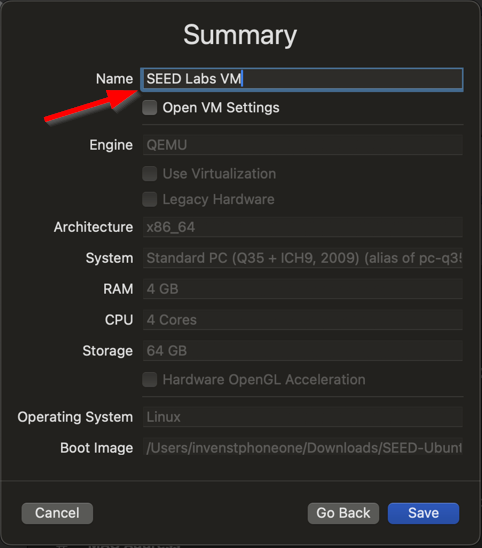
Step 10: Enter a name you will remember under "Name" and click save
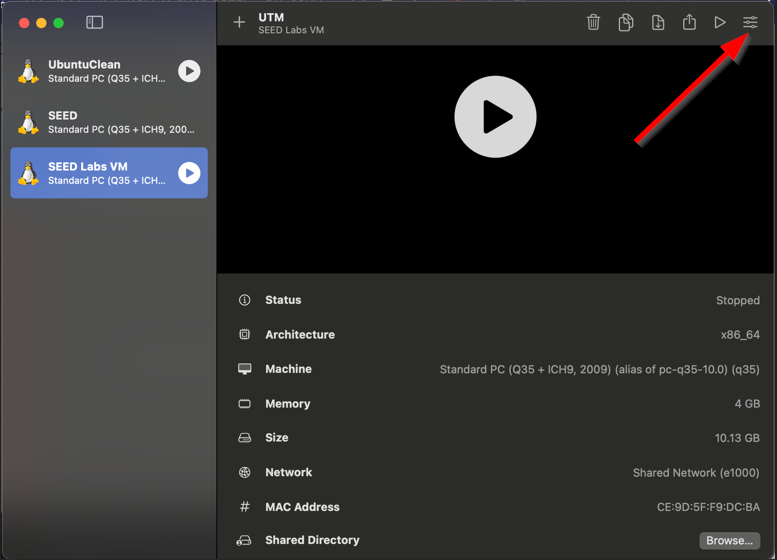
Step 11: Verify that the VM name you picked appears on the left hand side of the UTM app, and click on the settings icon in the upper right corner
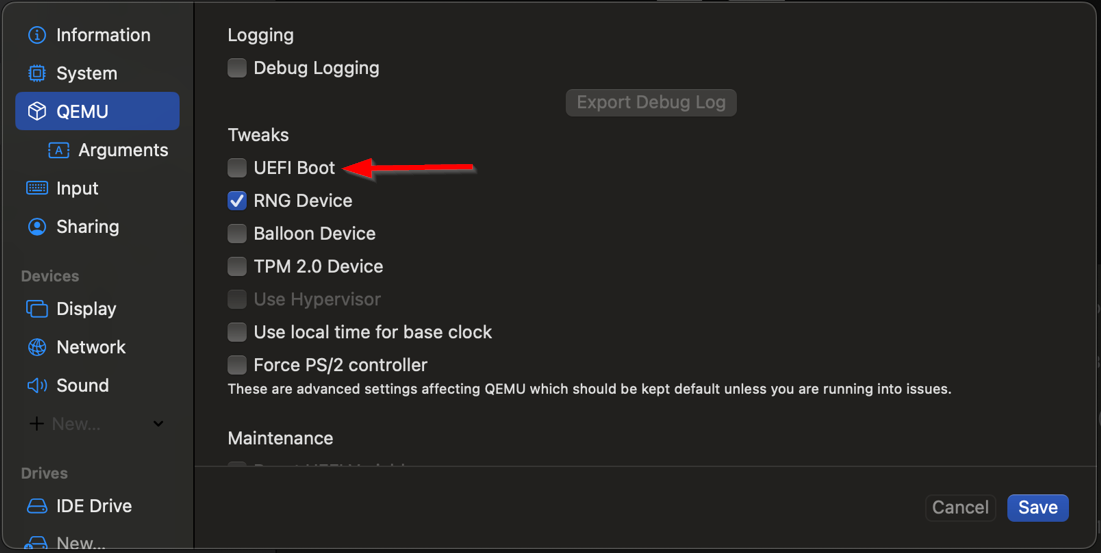
Step 12: Click on QEMU in the left menu, and DESELECT the UEFI Boot option
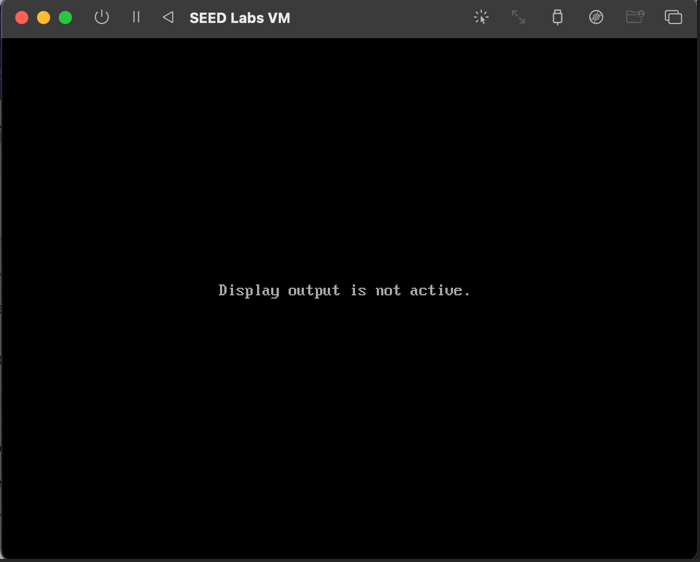
Step 13: Click "Play" on the VM. You will see the VM start, but likely you will just see the following for quite a long time
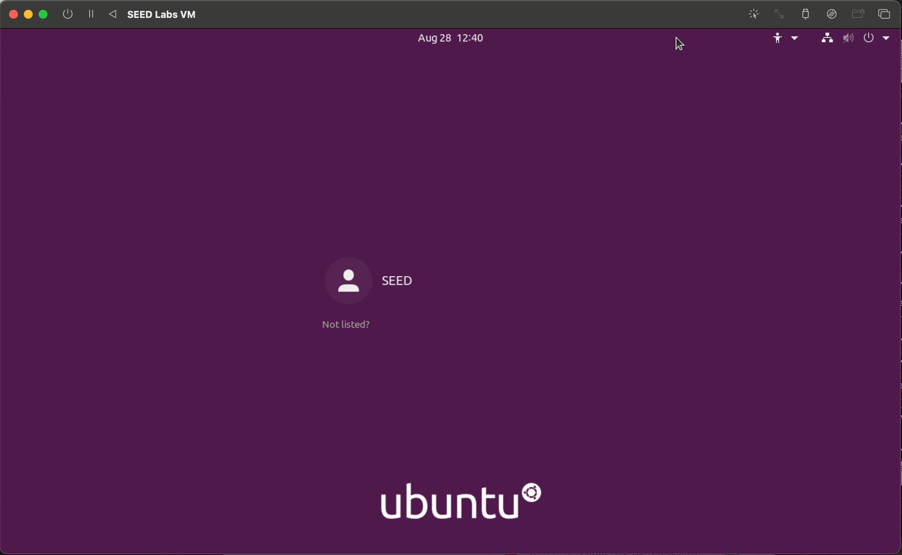
Step 14: You will eventually get to the following screen. Click on the user SEED, and type in the password "dees" (all lower case)
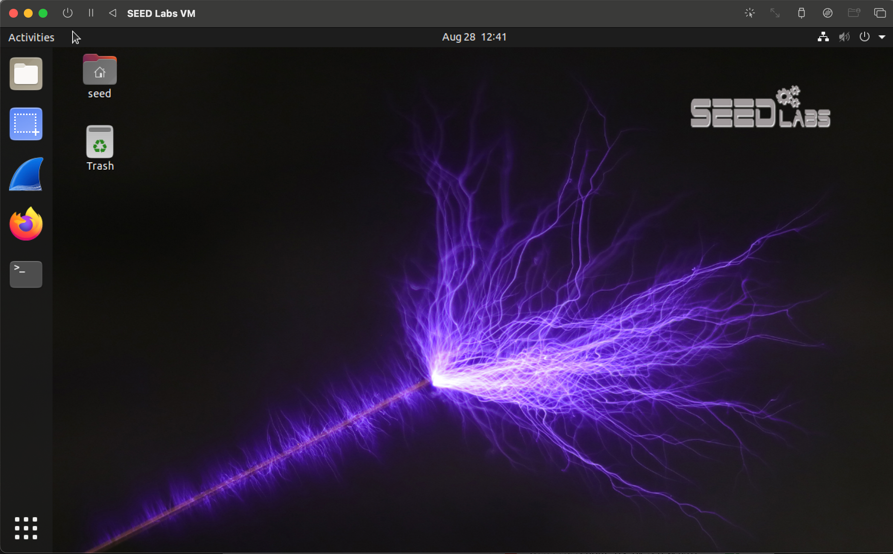
Step 15: You will again be faced with a blank screen for what feels like an unreasonable amount of time (for me it was about 45 seconds). Eventually, you will see the following desktop
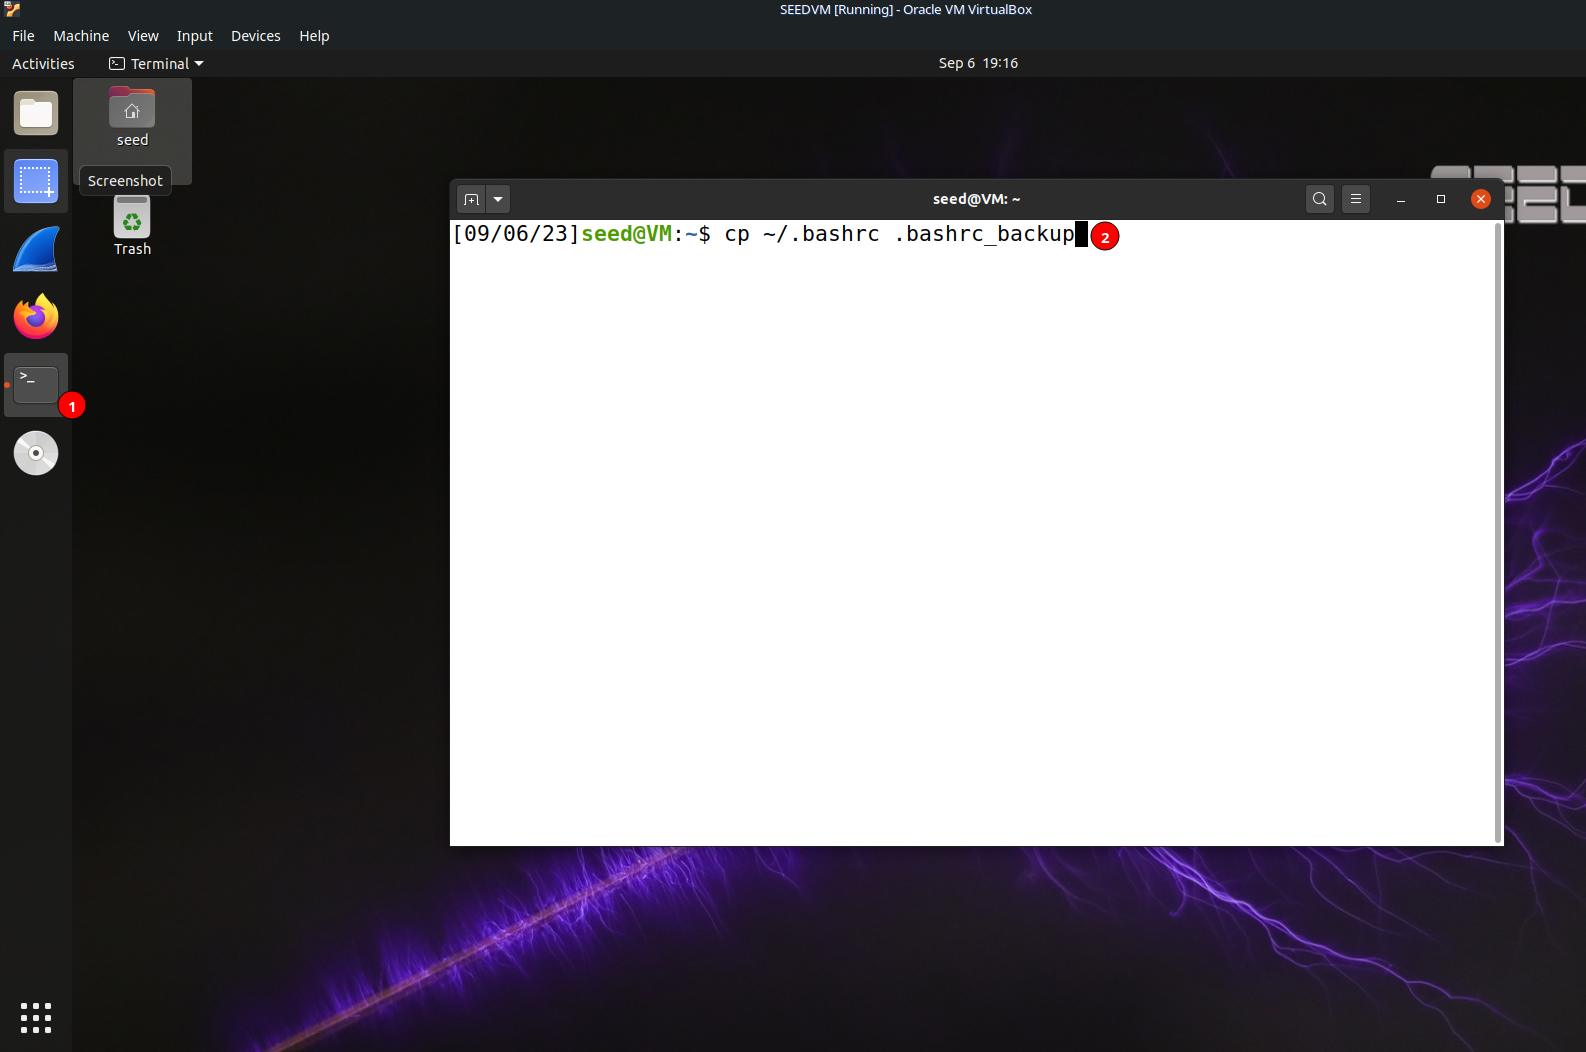
Step 16: Open up the terminal (1) and type the command (2)
cp ~/.bashrc .bashrc_backup
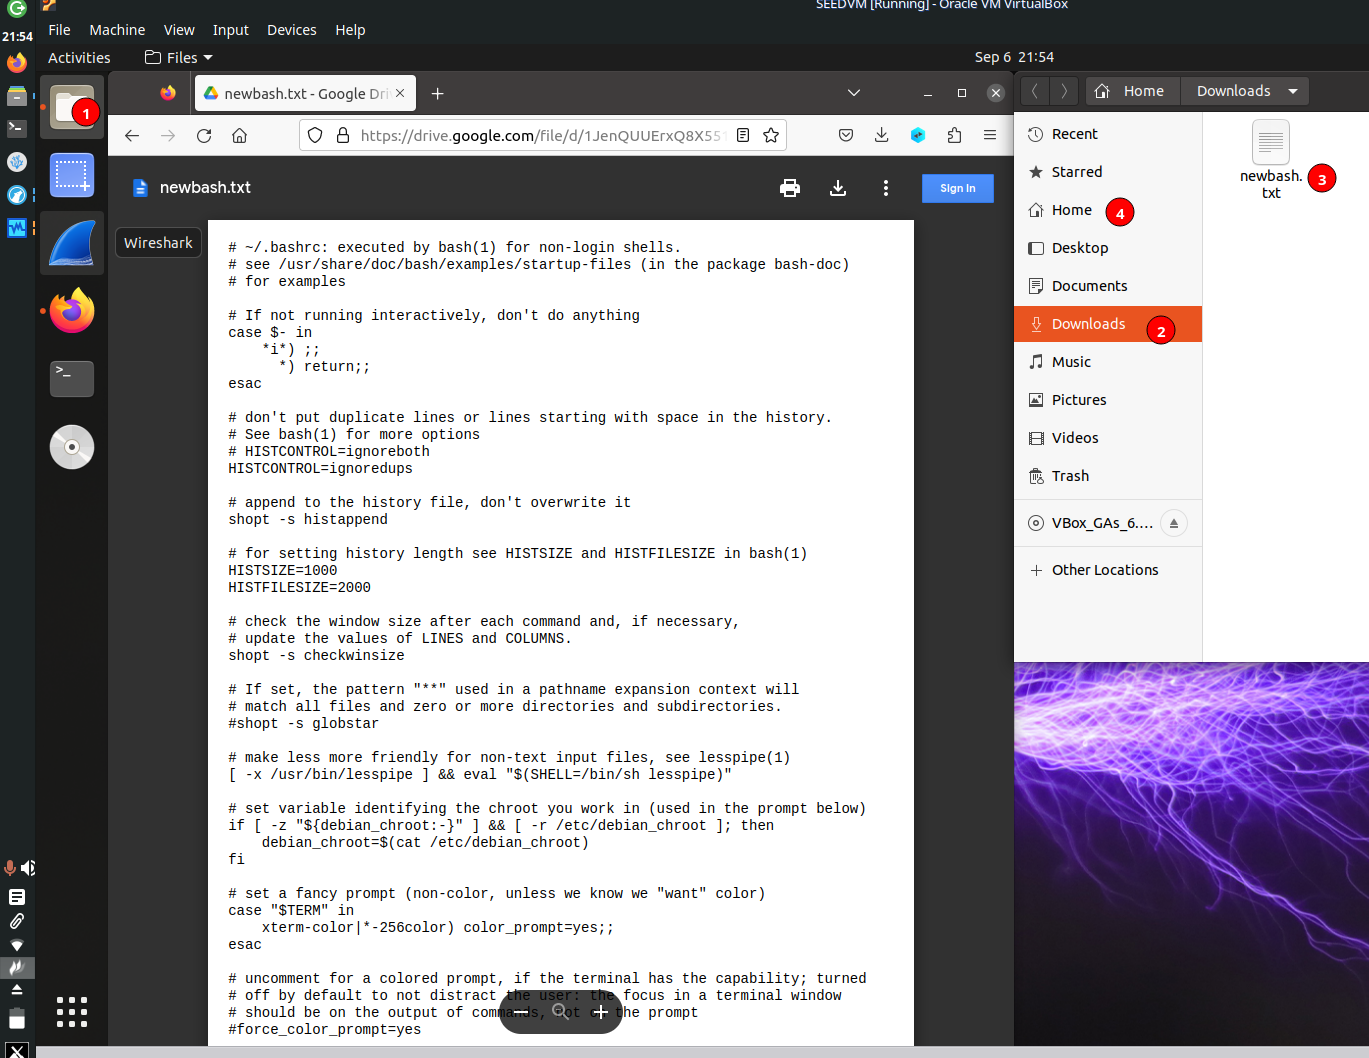
Step 17: Open your browser(1) and go to https://cse365.cse.buffalo.edu/newbash.txt, then download the file by clicking the three horizontal lines in the top right of the page and picking "Save Page as...".
Step 18: Open your file explorer (1), navigate to the downloads folder (2), move the downloaded file (3) into your home directory (4).
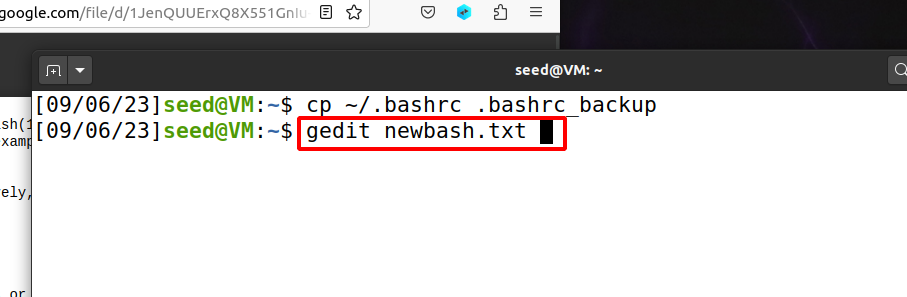
Step 19: In your terminal type and run the following command:
gedit newbash.txt
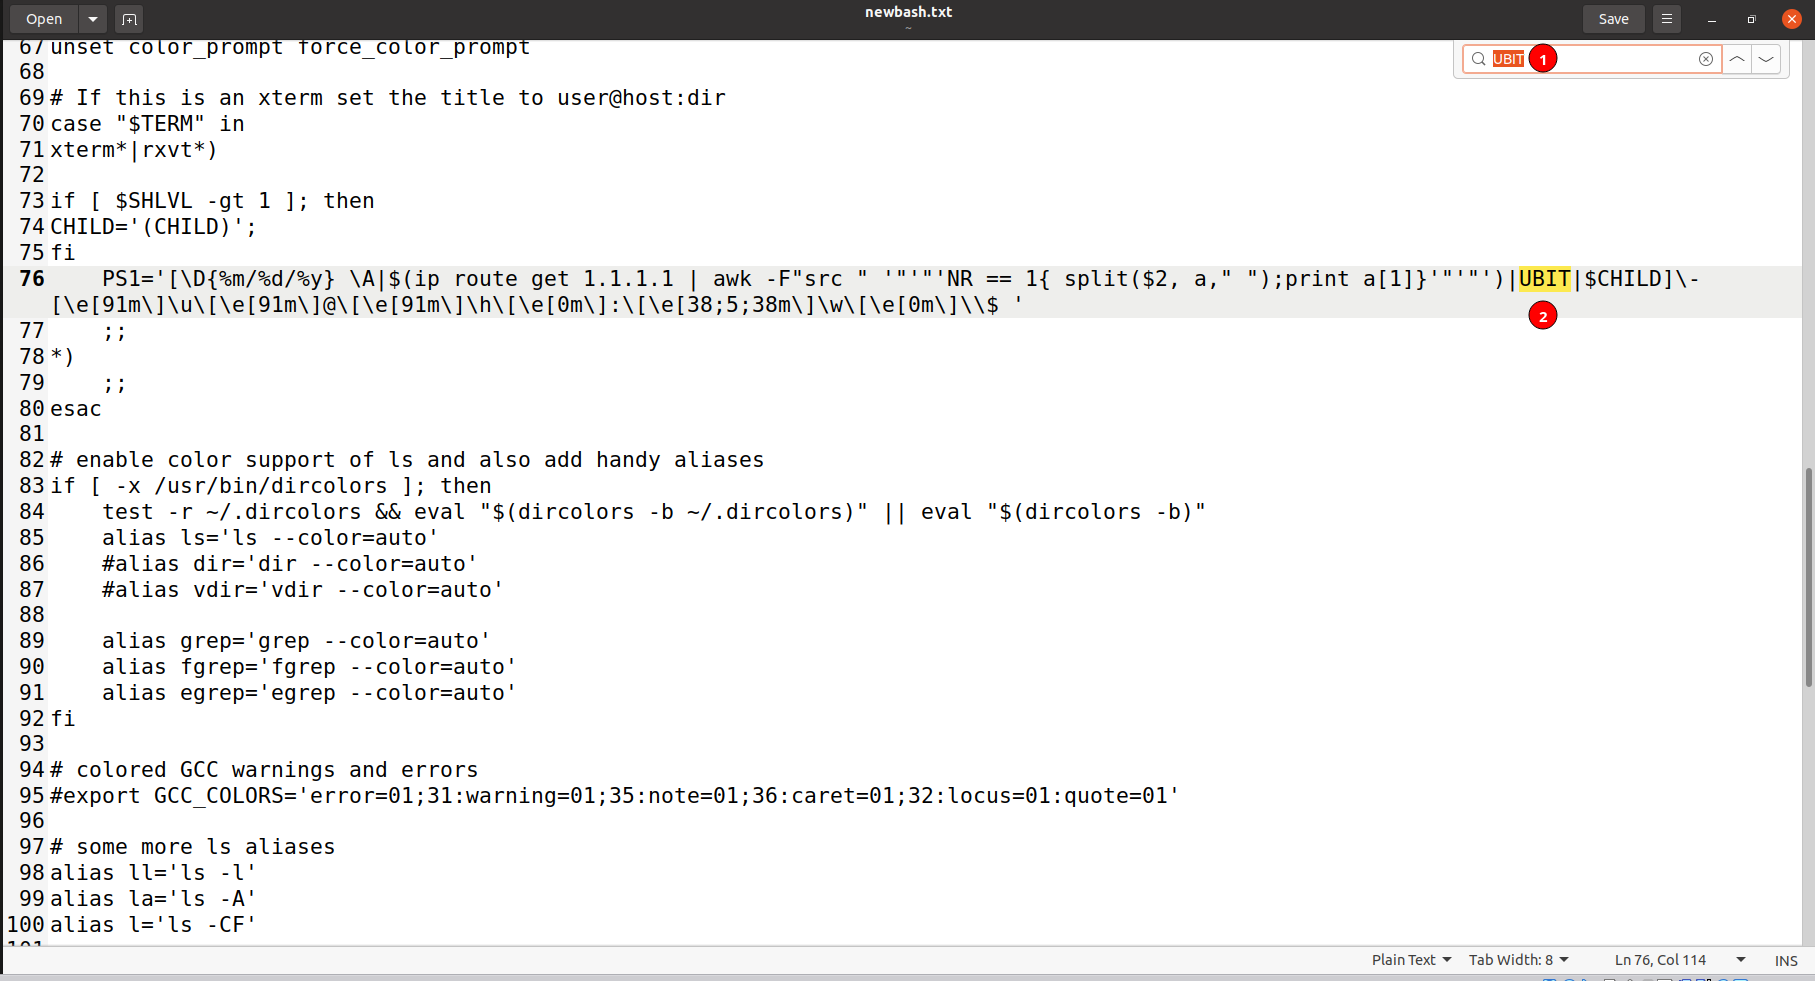
Step 20: A text editor will open up, press CTRL + F and type in UBIT (1). It should take you to line 73. Replace the UBIT with your UBIT (2)
Step 21: Save and close the file.
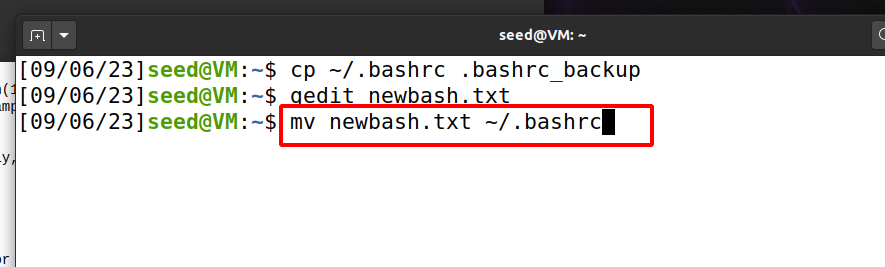
Step 22: In your terminal type and run the following command
mv newbash.txt ~/.bashrc
Step 23: Right click on the terminal icon (1) and then click new window (2).
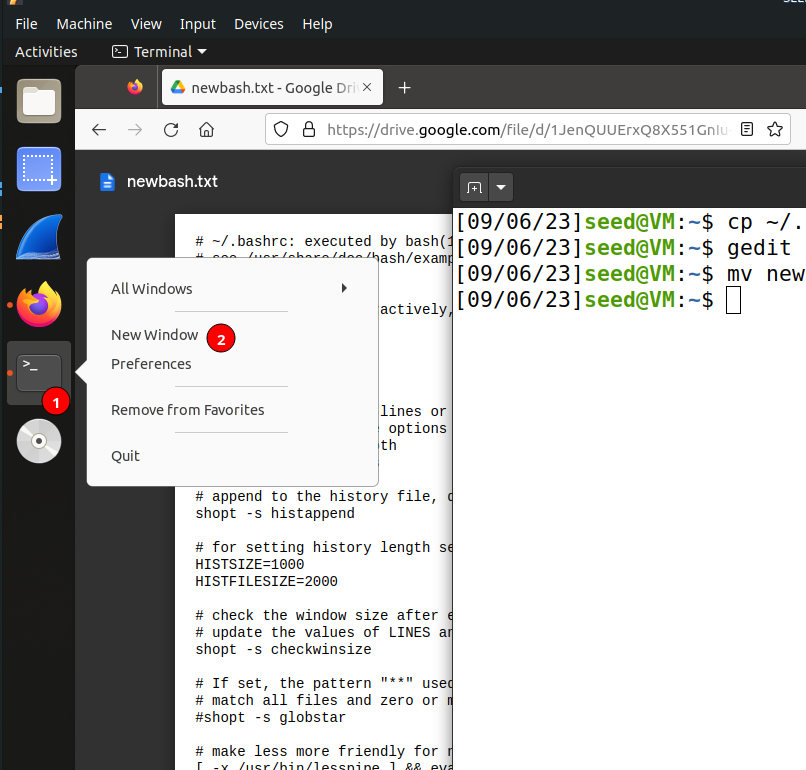
A new terminal should pop up that looks something like this:

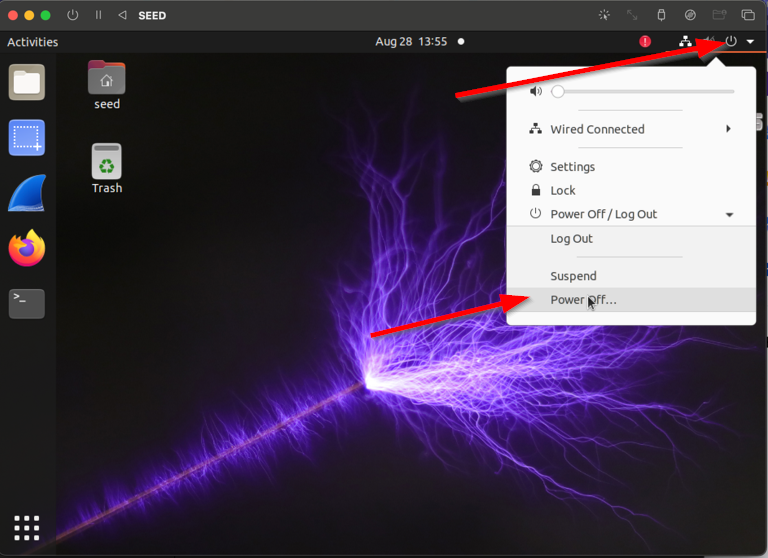
Step 24: Shut down the VM.
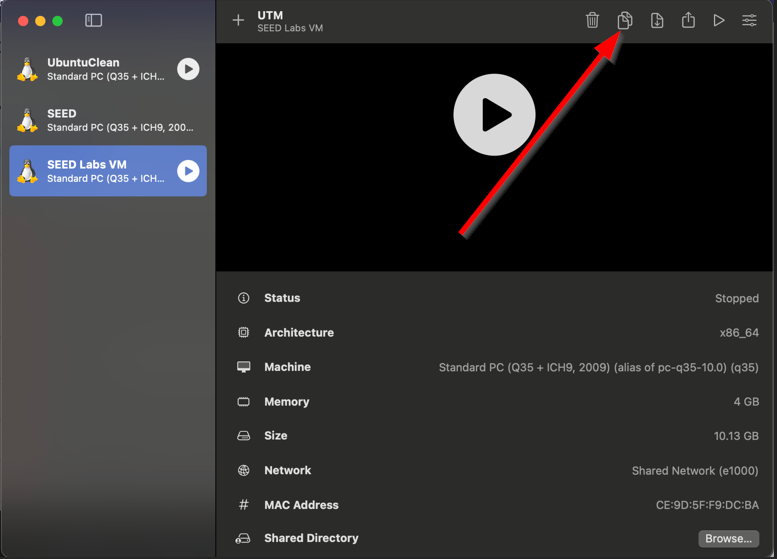
Step 25: Make a copy of the VM image. Unfortunatly, UTM does not allow snapshots like many virtual machine managers, so you can only clone the VM. This will allow you to have a backup copy to return to if you break your VM, however, rather than having to do this whole setup process again!