Note
If you run into any errors please reach out on piazza or attend office hours to get these issues resolved.

If you run into any errors please reach out on piazza or attend office hours to get these issues resolved.
First, you need to make sure that the VM is up-to-date with the latest packages available. Run the command below in the terminal.
sudo apt-get update
Once the prompt is returned, next we need to install snort. Run the command below to install sort.
While snort is installing in the terminal, if you are asked "Do you want to continue" enter y to continue.
sudo apt install snort
Now you should see this screen. To contiune hit the "TAB" key and then hit "enter".
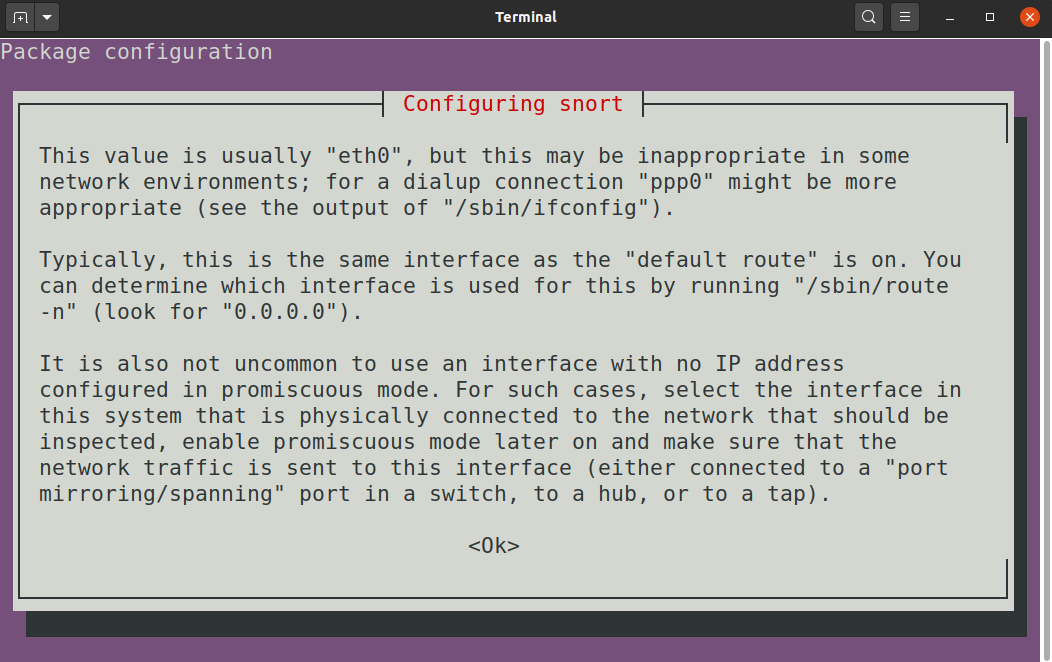
Now this screen should appear below
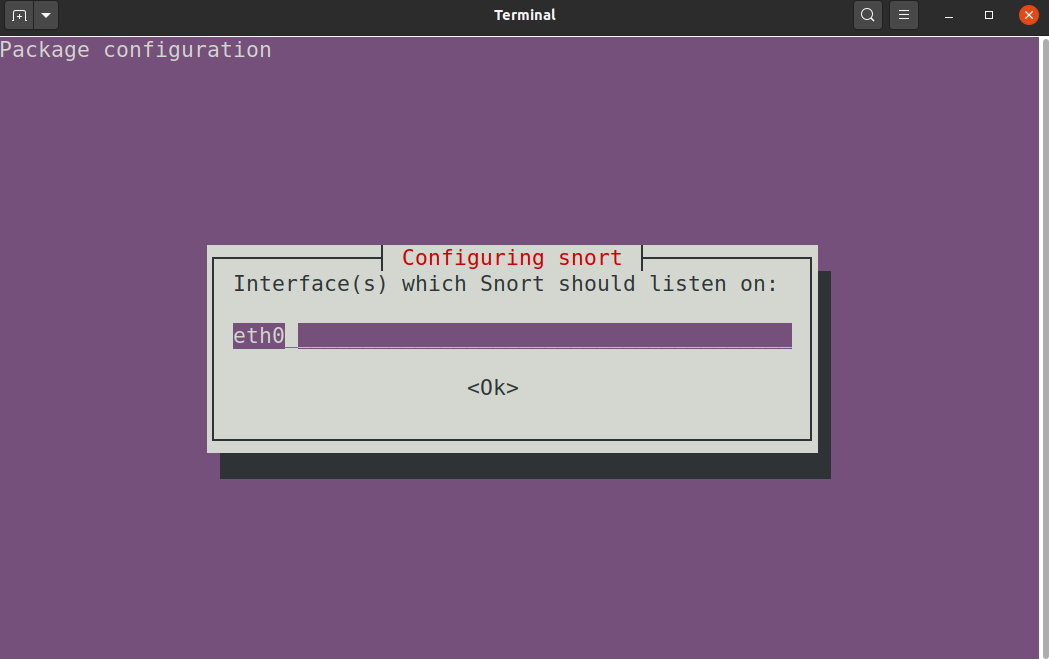
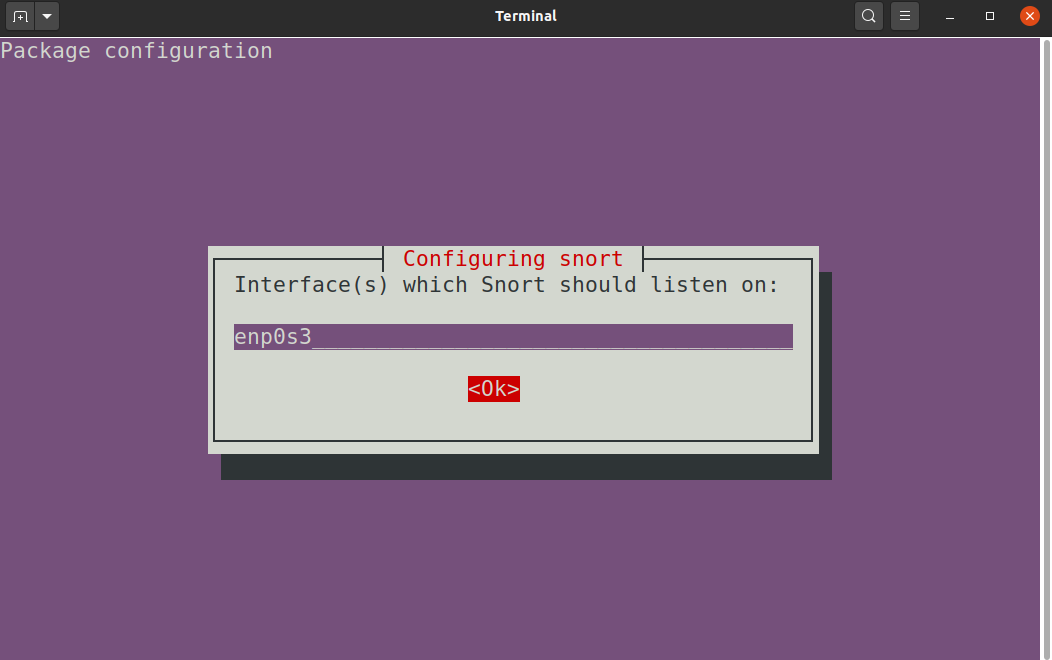
Next, we have to specify which network interface snort can listen on.
Enter: ens160
Enter: enp0s3
Once the interface is entered, contiune by hitting the "TAB" key and then hit "enter".
If you entered the wrong Network interface see the "Troubleshooting FAQ(Frequently Asked Questions)" at the bottom of this page
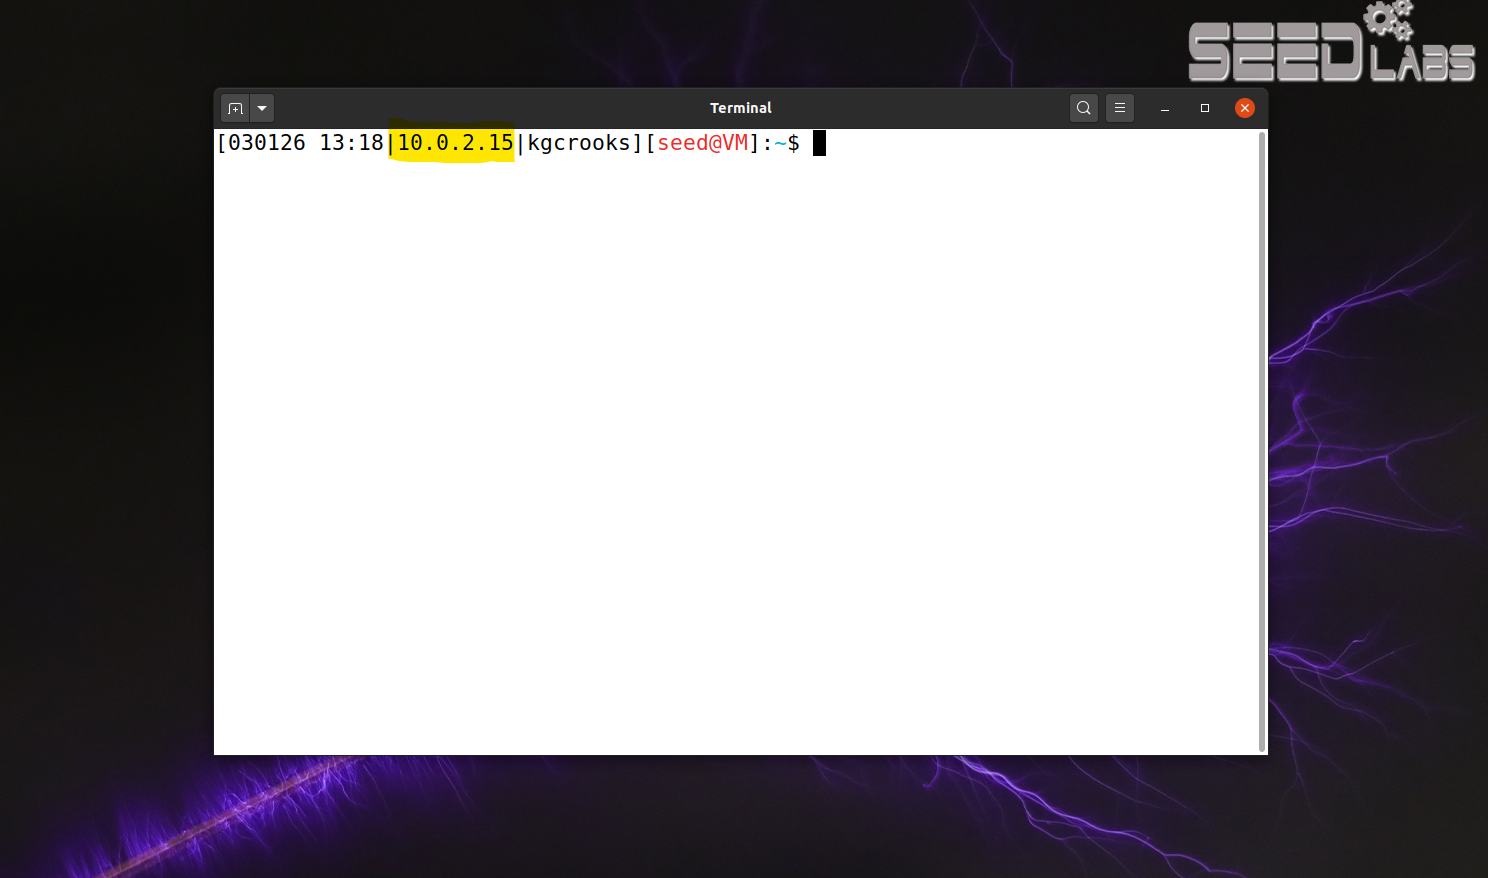
Find your IP address by looking at your terminal prompt.
Disclaimer: The IP address indicated below in yellow is an example and Not your IP Address.
If you entered the wrong IP Address see the "Troubleshooting FAQ(Frequently Asked Questions)" at the bottom of this page
Once you have found your IP address add it to the Snort config, hit the "TAB" key and then hit "enter".
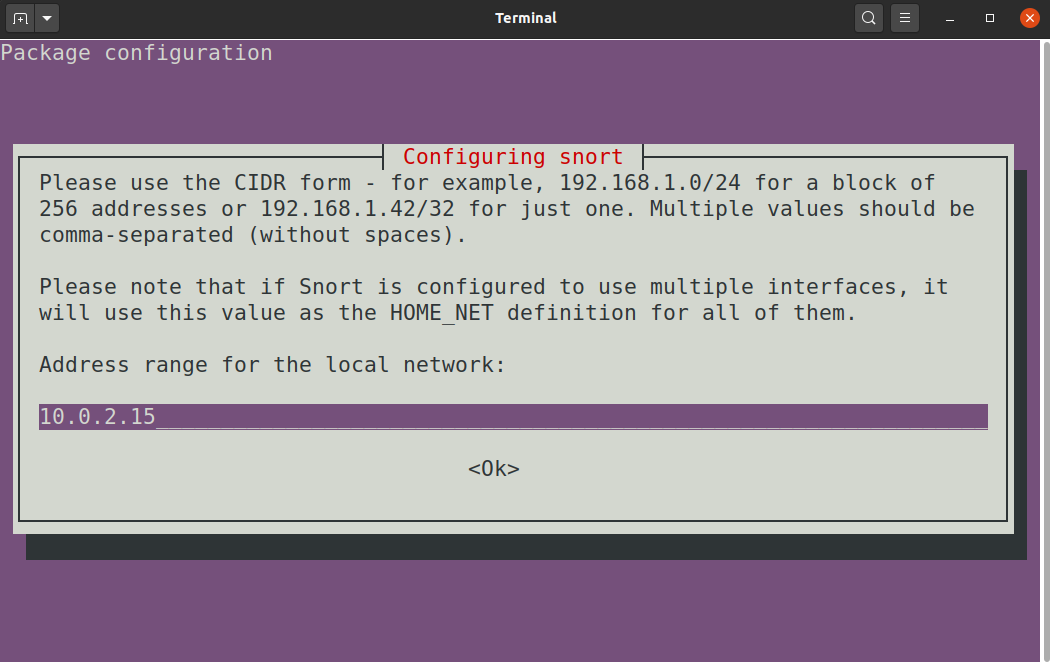
The Package configuration menu will appear again. To contiune hit the "TAB" key and then hit "enter".
Now you should see the network interface chosen from section 2.1.
Continue with "TAB" and "enter"
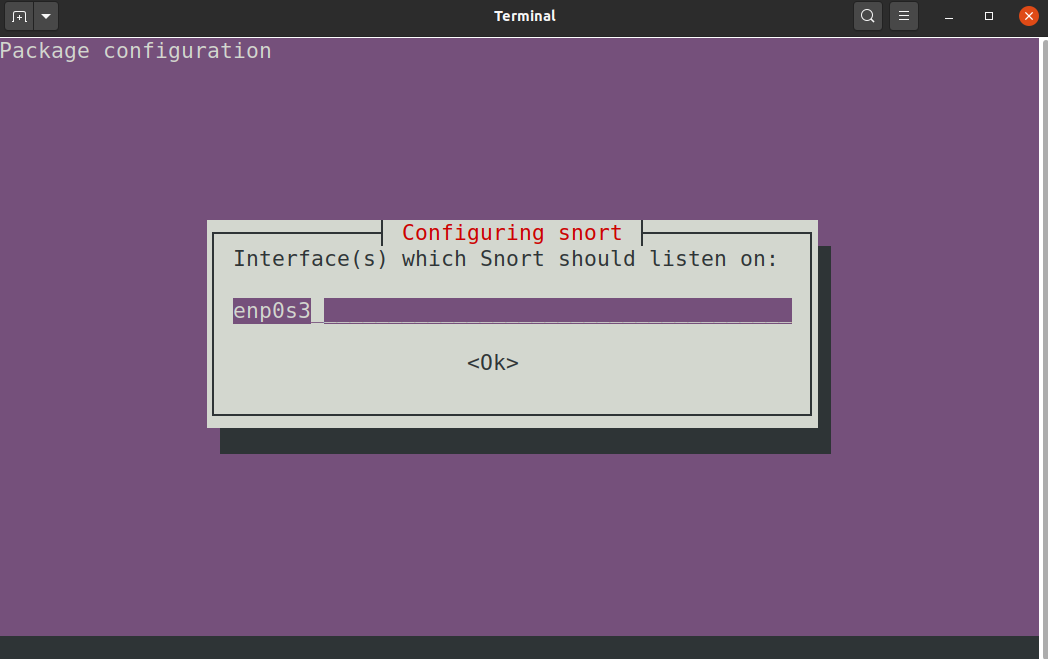
Now Snort should be installed and configured. Next, you have to edit the config file to set your IP address.
Run the command below in the terminal.
sudo gedit /etc/snort/snort.conf
Next hold down the control key(ctl) + "f"
Then enter this into the search bar.
ipvar HOME_NET
Then change the value from "any" to the IP address found from step 2.2.
Once "ipvar HOME_NET" is updated, make sure to Save the file.
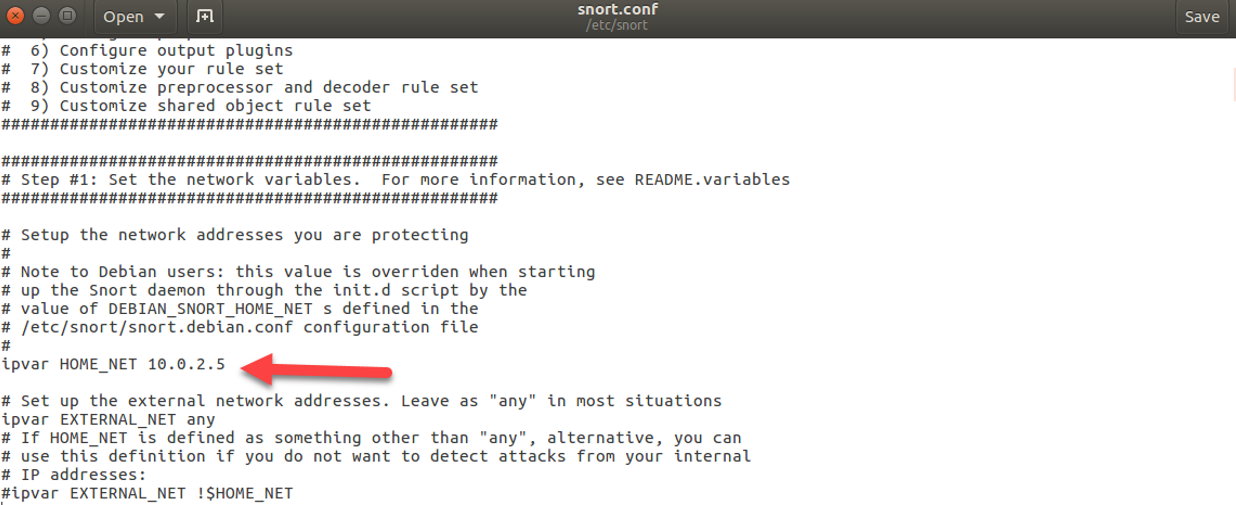
Finally, run a test command to make sure that snort is configured correctly.
Run the command below in the terminal.
sudo snort -T -c /etc/snort/snort.conf
Now confirm that the terminal outputs this screen.
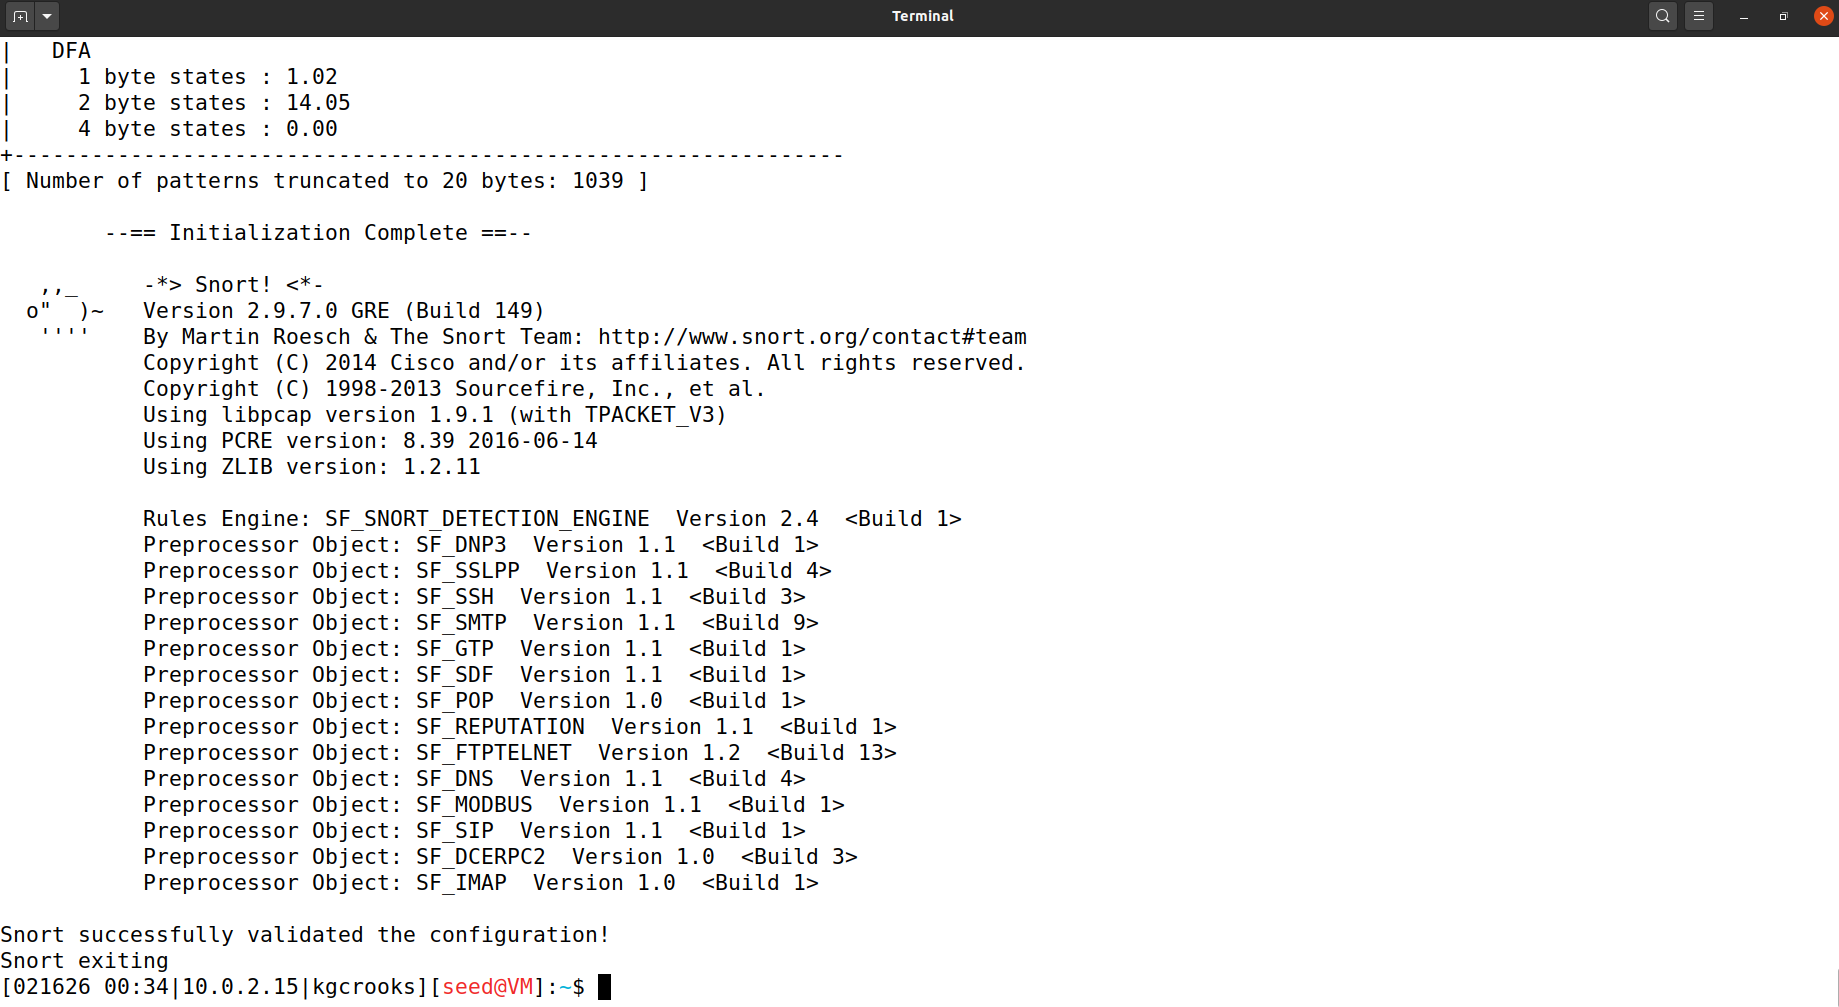
Additionally, you can start snort with the "-v" flag to run Snort while displaying the current version 2.9.7.0.
sudo snort -v
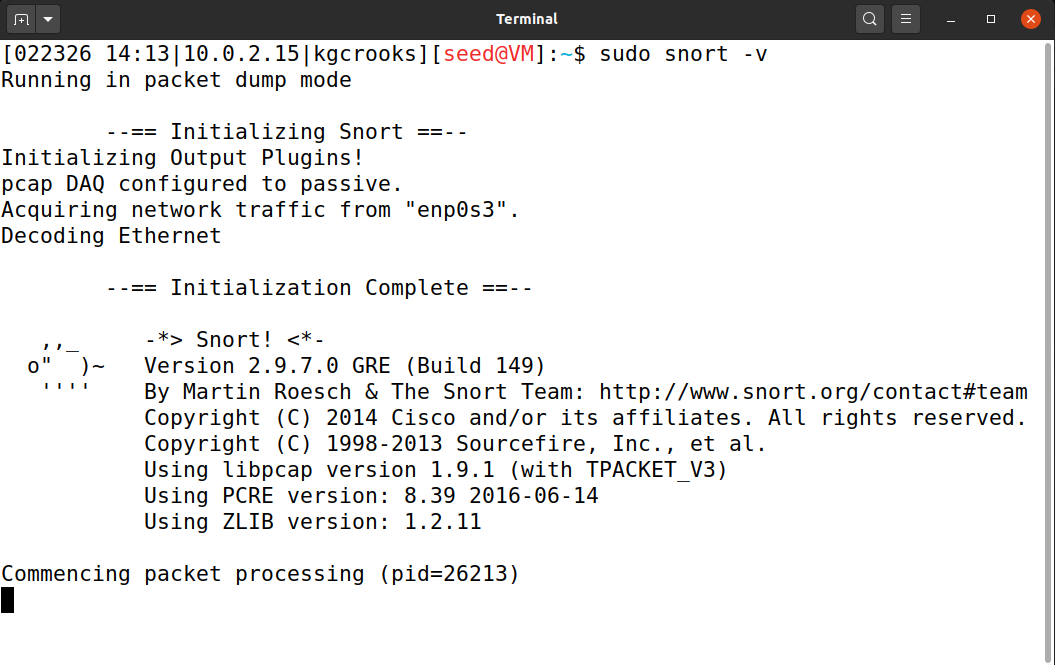
Congrats on Completing the Snort Setup Guide. :D
   ,,_
  o"  )~    -*> Snort! <*-
   ''''