VM Setup Guide
So after working through office hours, I've noticed that some of the video instructions to install the VM are very windows specific, so I'm going to type up a slightly better/platform agnostic guide to installing the VM. If you are on Windows you can continue to follow along with the video instructions as normal.
These instructions are sourced from the seedlabs documentation and I highly recommend you check them out whenever you get stuck.
If you have an M1/M2 Mac, please refer to Piazza!
That being said, here are the instructions:
Step 1: Install virtualbox
Step 2: Download the SeedLabs VM
Step 3: Unzip the file you downloaded in step 2, and save it someplace safe that you can remember. I recommend your documents folder.
Step 4: Click on new VM

Step 5: Click the option for expert mode

Step 6: Name your VM something that you can remember (1), and then set the type to "Linux" (2), and the version to "Ubuntu (64-bit)" (3). If you have more than 8GB of RAM on your host system, set the memory size (4) to 4096 MB. If you have 8GB or less, set the memory size to 2048 MB

Set 7: On the same page, click "use an existing virtual hard disk file" (1), and then click the folder icon (2)

Step 8: Click the add button

Step 9: Navigate to where you saved the extracted file in step 3, and click open

Step 10: Select your newly created VM (1) and then click settings (2).

Step 11: Select general (1), advanced (2) and then set both the shared clipboard (3), and the drag-n-drop(4) option to "Bidirectional".

Step 12: Select display (1), then edit the video memory to be 64 MB (2), the graphics controller to be VMSVGA (3), and enable 3d acceleration (4).

Step 13: At this point you need to setup the Network. Go into your VM under settings->network, and pick the NAT as the network type. Refresh your mac address, and restart the VM.
Step 14 (Windows Version): Open the Windows start menu and search for "Powershell" Right Click and select "Run as Administrator"
Run the following in the powershell window.
cd ../../
cd "Program Files\Oracle\VirtualBox"
./VBoxManage.exe list vms
Find the name of your VM, and copy the part next to in in brackets.
 Then run
./VBoxManage modifyvm "{Name of the VM in brackets}" --nested-hw-virt on
Replace the {Name of the VM in brackets} with the data in the red box in the image above.
If you get an error that says "This machine is not mutable" then follow the steps below:
./VBoxManage.exe discardstate "{Name of the VM in brackets}"
./VBoxManage.exe modifyvm "{Name of the VM in brackets}" --nested-hw-virt on
Step 14 (Linux/MacOS Version): Open up a terminal and type:
vboxmanage list vms
Find the name of your VM, and copy the part next to in in brackets.

Then run
vboxmanage modifyvm "{Name of the VM in brackets}" --nested-hw-virt on
Replace the {Name of the VM in brackets} with the data in the red box in the image above.
If you get an error that says "This machine is not mutable" then follow the steps below:
vboxmanage discardstate "{Name of the VM in brackets}"
vboxmanage modifyvm "{Name of the VM in brackets}" --nested-hw-virt on
Step 15: Start the VM.

Step 16: Login to the seed account with the password dees.

Step 17 (Optional): At the very top of the screen, click Devices, and then insert guest additions CD

Step 18 (Optional): Click run on the pop-up box that appears.

Step 19 (Optional): Enter the password dees into the pop up box that appears.
Step 20 (Optional): When prompted, type yes to continue.

Step 21 (Optional): Once the process completes, restart your VM.
Step 22: Open up the terminal (1) and type the command (2)
cp ~/.bashrc .bashrc_backup

Step 23: Open your browser(1) and go to https://cse365.cse.buffalo.edu/newbash.txt, then download the file by right clicking and picking "save as".
Step 24: Open your file explorer (1), navigate to the downloads folder (2), move the downloaded file (3) into your home directory (4).
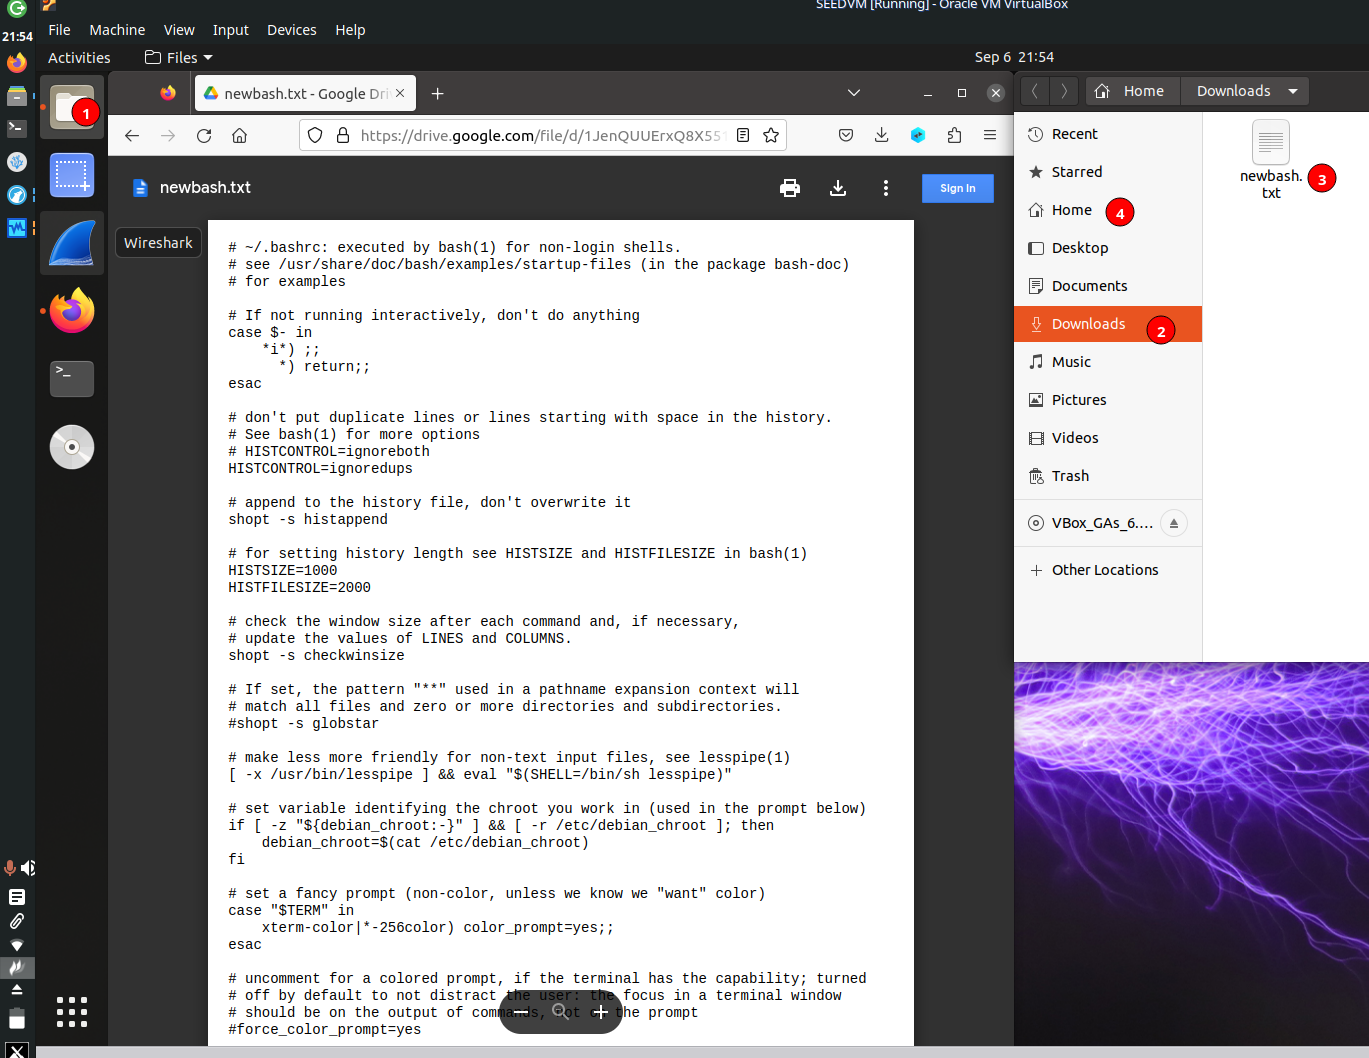
Step 25: In your terminal type the following command:
gedit newbash.txt

Step 26: A text editor will open up, press CTRL + F and type in UBIT (1). It should take you to line 73. Replace the UBIT with your UBIT (2)
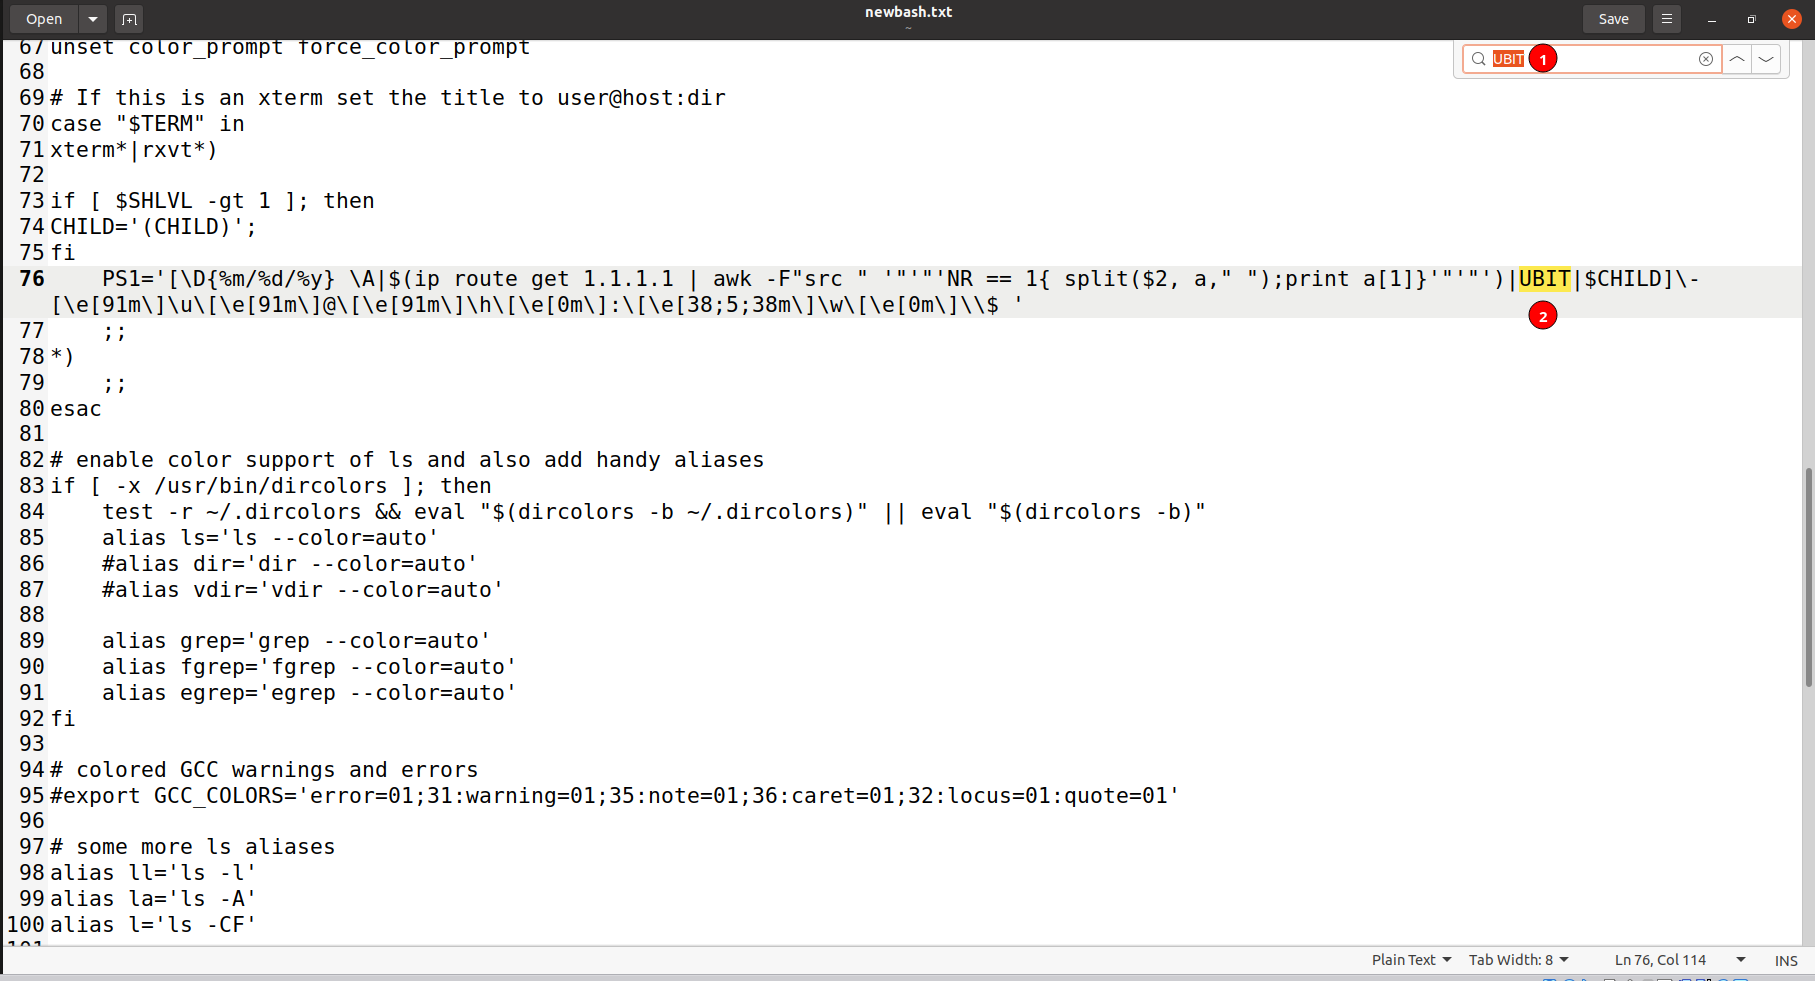
Step 27: Save and close the file.
Step 28: In your terminal type the following command
mv newbash.txt ~/.bashrc

Step 29: Right click on the terminal icon (1) and then click new window (2).
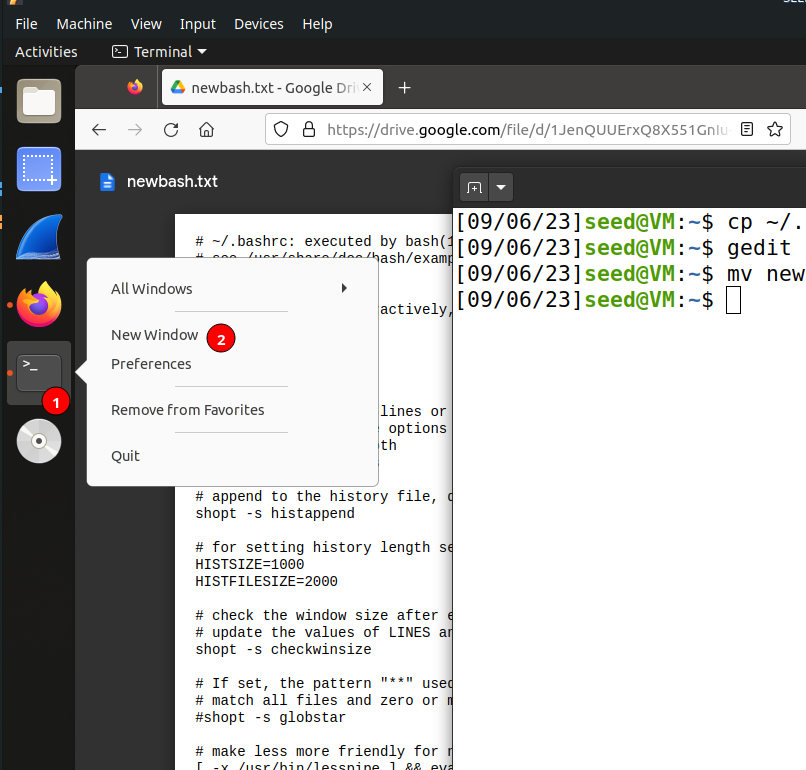
A new terminal should pop up that looks something like this:

Step 30: Shut down the VM.
Step 31: Select your VM (1) and then click settings (2).
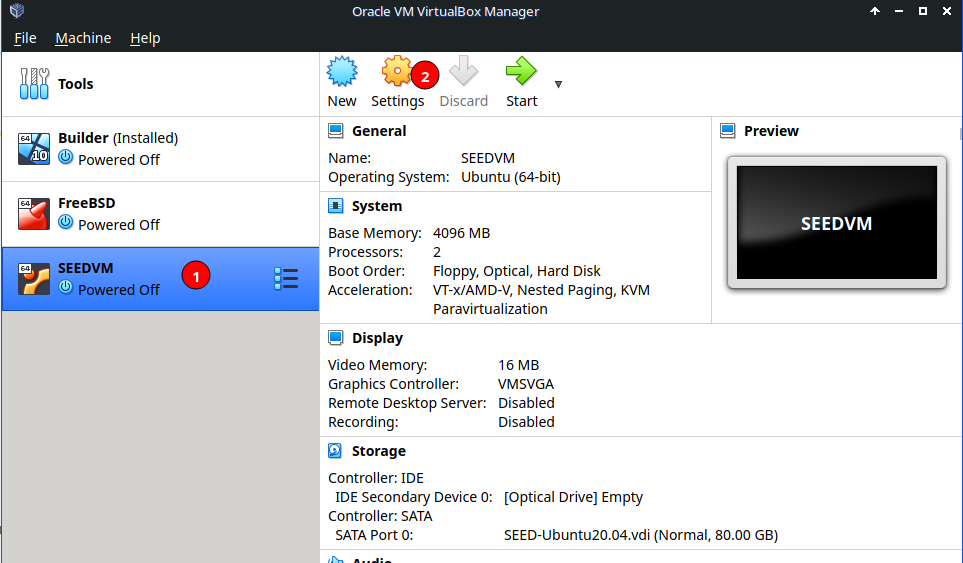
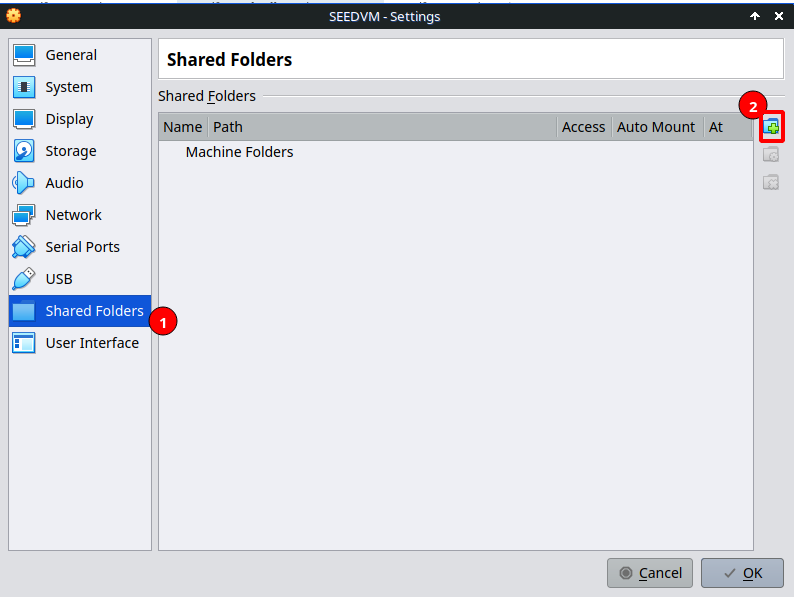
Step 32: Click on shared folders (1), and then click on the plus icon (2).
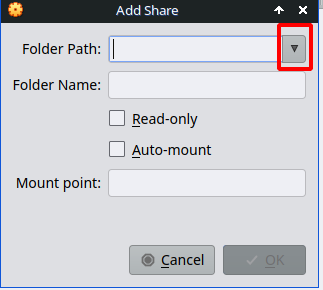
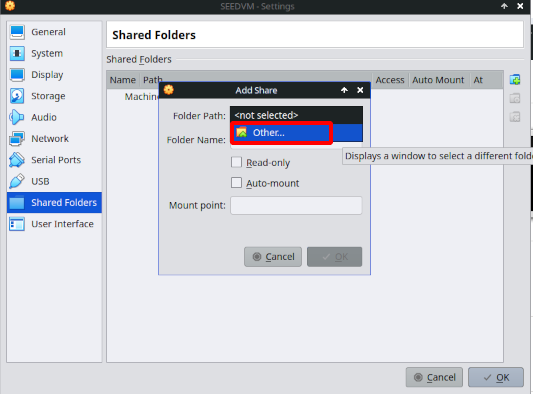
Step 33: Click the drop down icon and then click other
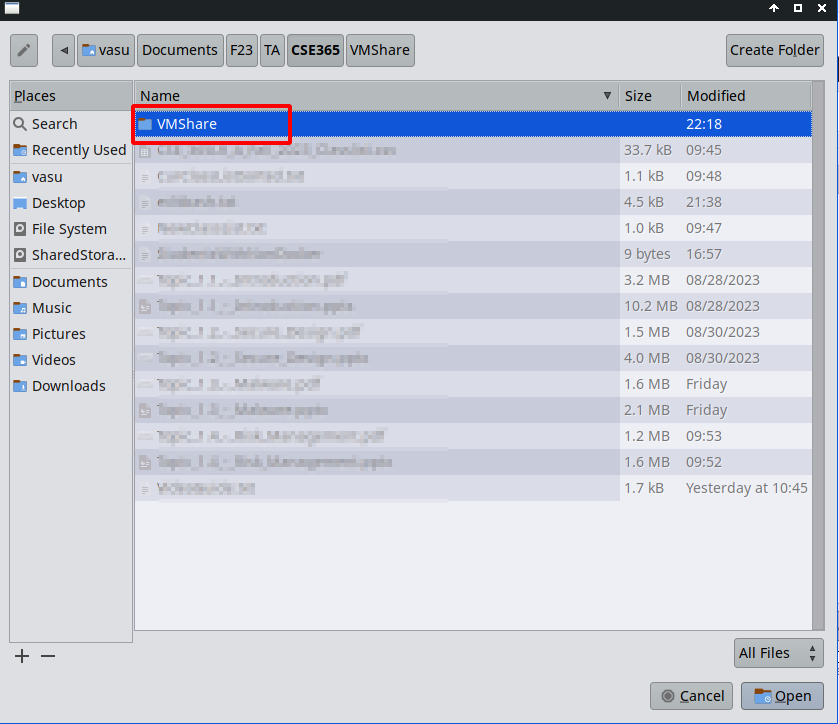
Step 34: Navigate to a place on your filesystem and make a new folder, or select an existing folder that you can use to share files between your VM and your host machine.
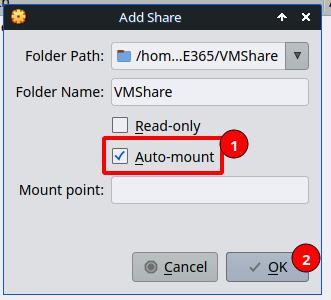
Step 35: Check the auto-mount box (1), and then click ok (2).
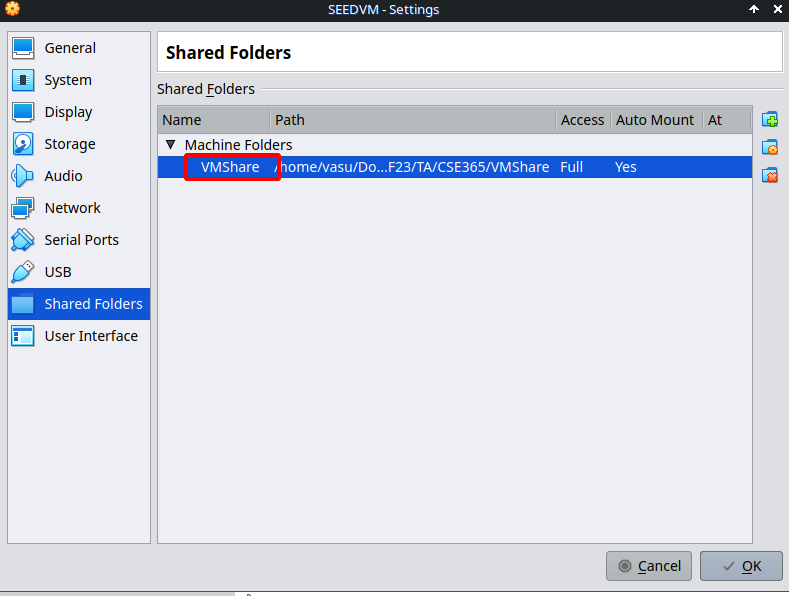
Step 36: Make a note of the folder name.
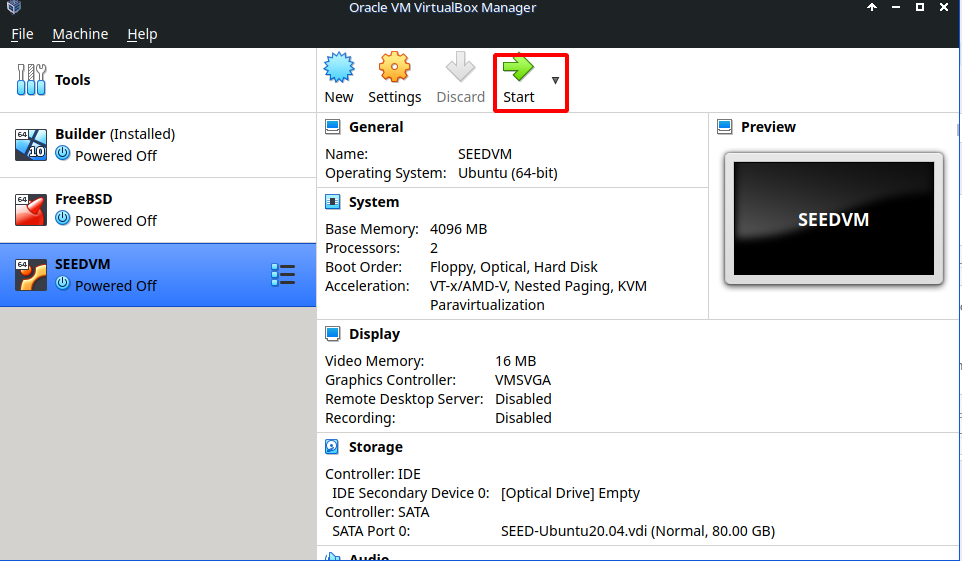
Step 37: Turn on your VM
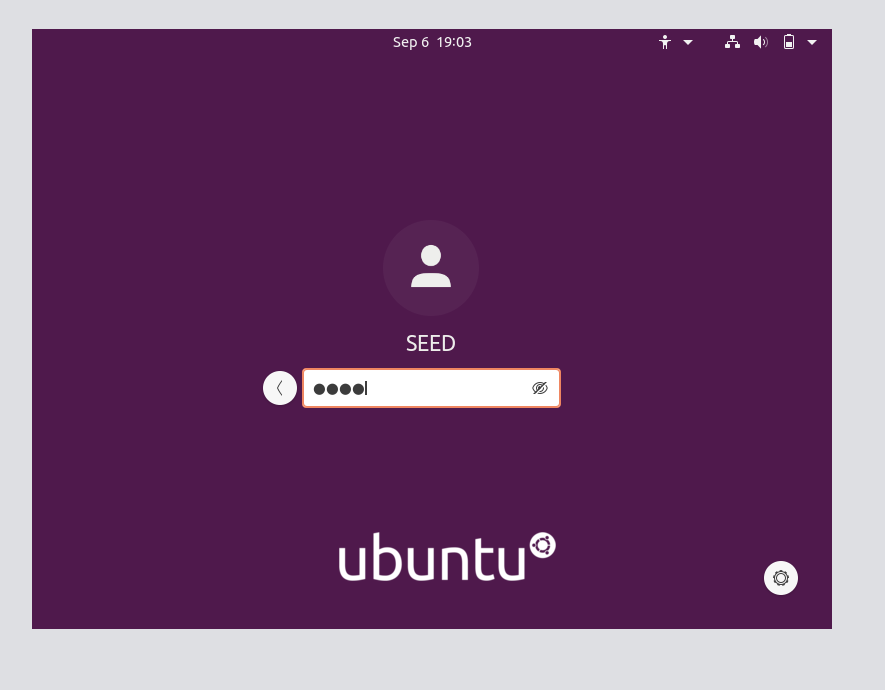
Step 38: Login to the seed account with the password dees.
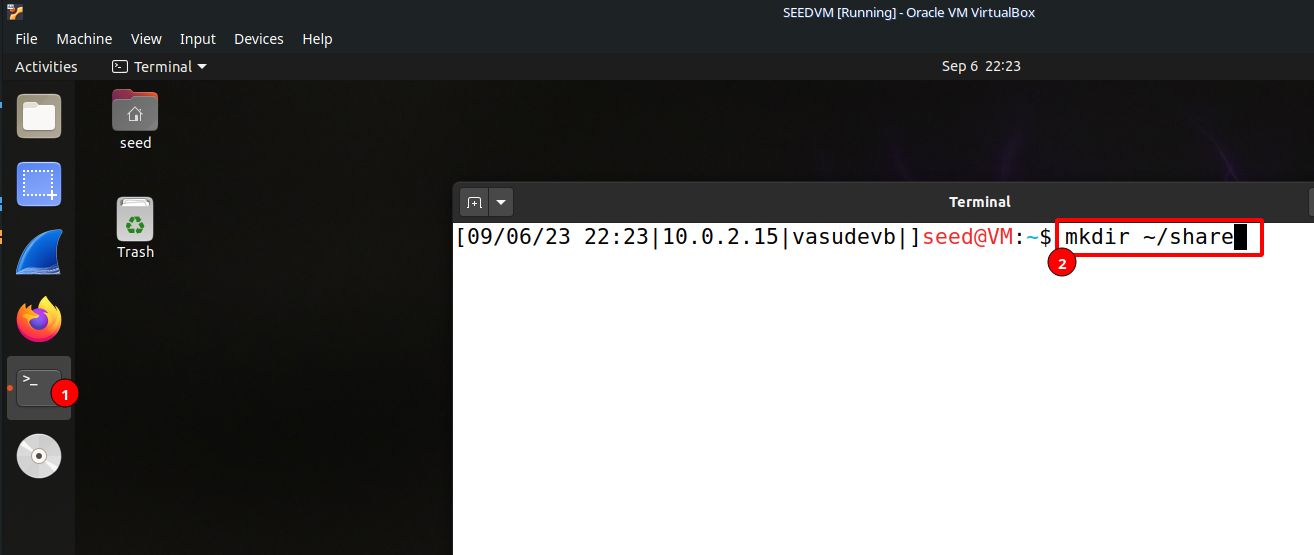
Step 39: Open up a terminal window (1), and the type in the following command
mkdir ~/share
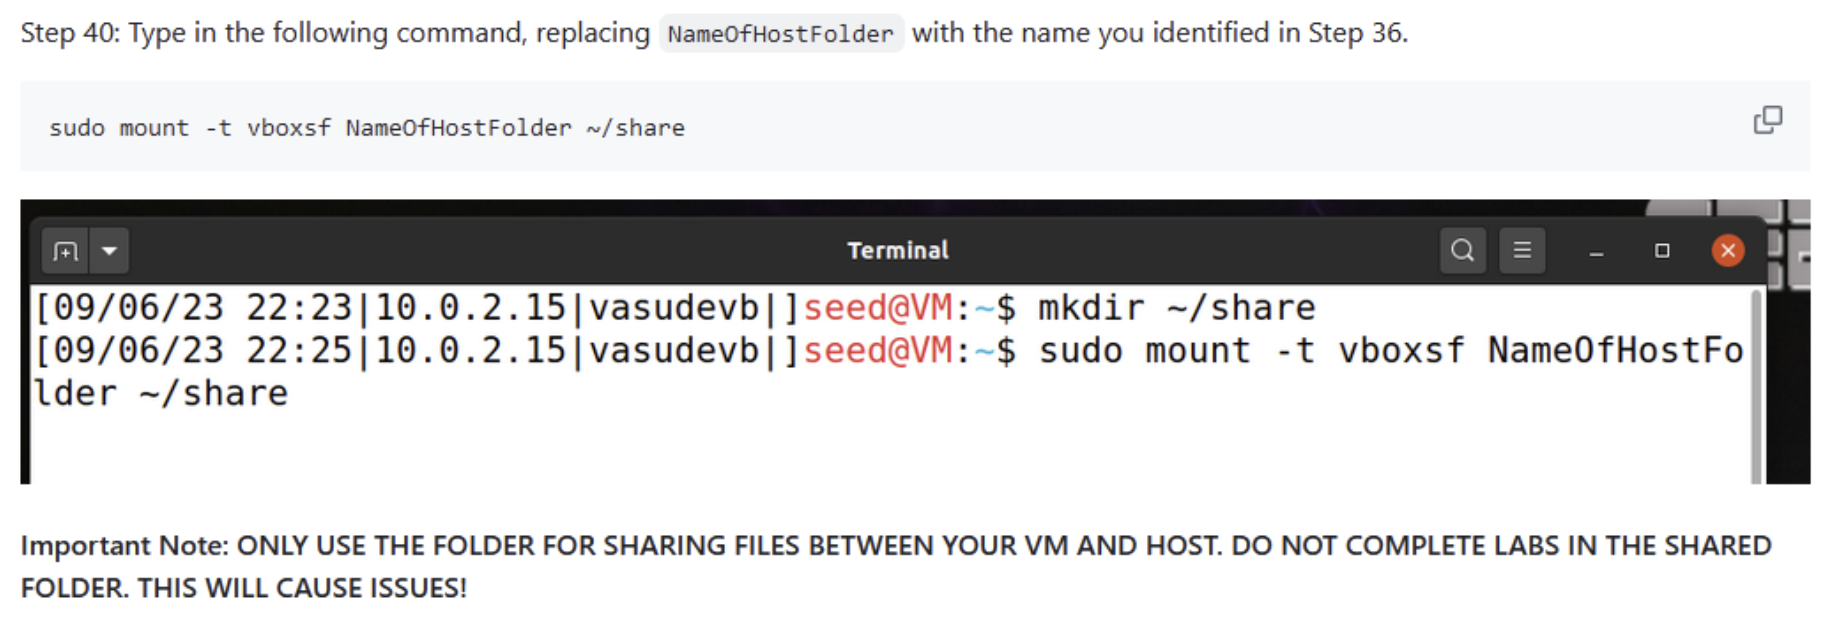
Step 40: Type in the following command, replacing NameOfHostFolder with the name you identified in Step 36.
sudo mount -t vboxsf NameOfHostFolder ~/share
Important Note: ONLY USE THE FOLDER FOR SHARING FILES BETWEEN YOUR VM AND HOST. DO NOT COMPLETE LABS IN THE SHARED FOLDER. THIS WILL CAUSE ISSUES!
Step 41: Turn off your VM
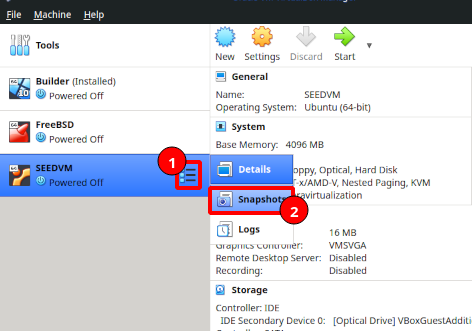
Step 42: Click on the VM menu icon (1), and then click on the snapshots button (2).
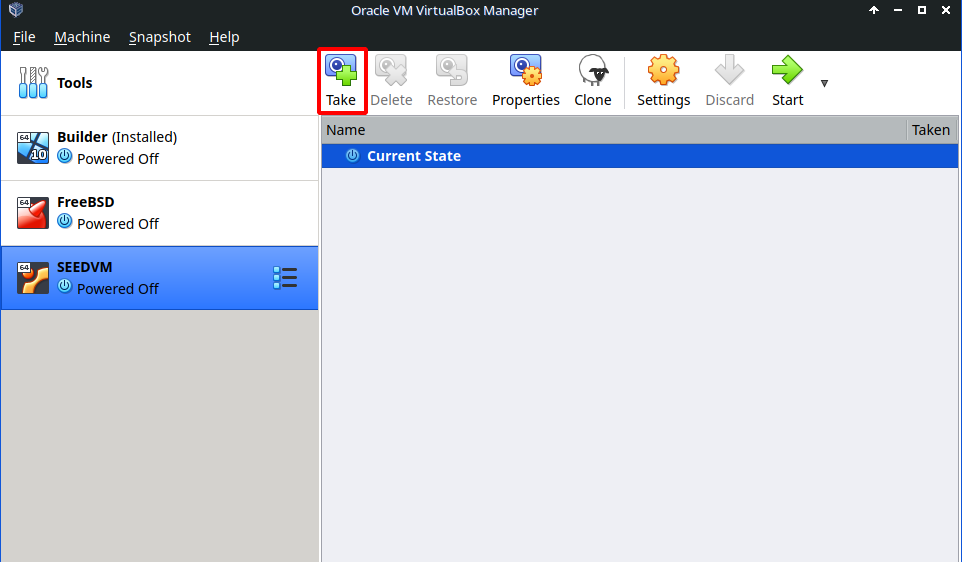
Step 43: Press the Take Icon
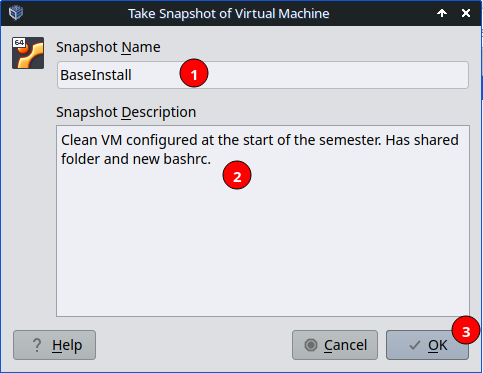
Step 44: Give it a reasonably descriptive name (1) and optionally a description (2). Then click ok(3).
Congratulations! You have successfully setup the SeedVM for this class!
If you have any questions about this process, or want to know why we did something in a particular manner feel free to ask.